Track Investigation Evidence
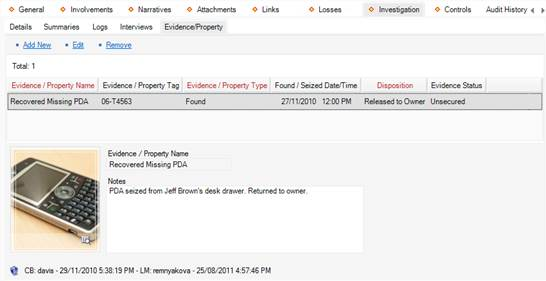
1. Select the Investigation tab.
2. Select the Evidence/Property sub-tab.
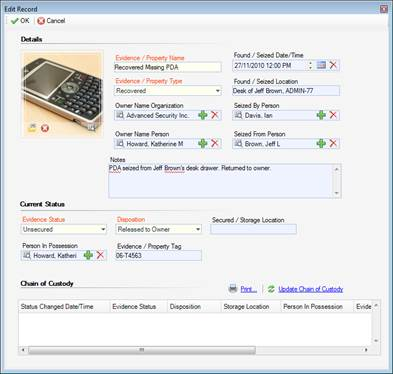
3. Click the appropriate Add link. A pop-up window will open.
4. Input the item name under Evidence/Property Name.
5. Choose the applicable description from the Evidence/Property Type lookup list (e.g., Found, Recovered, Seized).
If known, select the name of the organization or person who owns the item from the Owner Name Organization or Owner Name Person pick lists. If an Organization or Person record does not already exist, use the Quick Add function to create one.
6. Specify the date and time the item was found/seized in the Found/Seized Date/Time field.
7. Describe where the item was found or seized in the Found/Seized Location field.
8. Select the person who seized the item from the Seized By Person pick list.
9. Indicate who the item was seized from by making a selection from the Seized From Person pick list.
10. Type any additional information about the item in the Notes textbox.
11. To add an image of the item to the record, click the Add icon  in the image box.
12. Locate the image file in the browser window and click Open.
13. In the Current Status section, choose the appropriate descriptors from the Evidence Status and Disposition lookup lists.
14. If the item is secured, enter the current location of the item in the Secured/Storage Location field.
15. Select the person who is currently in possession of the item from the Person In Possession pick list.
16. Input the applicable number in the Evidence/Property Tag field.
17. Click OK to save the entity in the Evidence/Property grid.
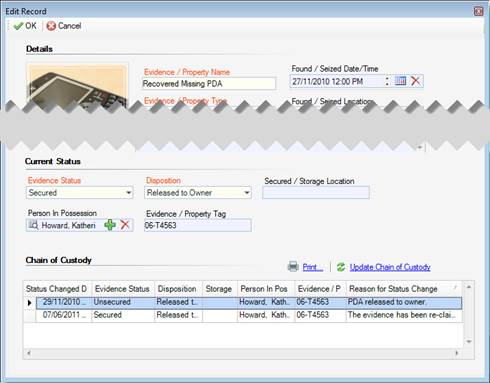
If you need to update the evidence’s current standing, you have to open the relevant evidence entity in the edit mode, make the necessary changes to the fields listed under Current Status, and follow the procedures described below:
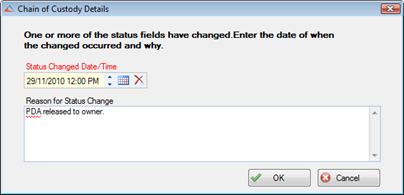
1. Click the Update Chain of Custody link. A pop-up window will open indicating that one or more of the status fields have been changed.
2. By default, the current date will appear in the Status Changed Date/Time field. Modify this if the item’s status actually changed at an earlier date.
3. Explain the change to the item’s status in the Reason for Status Change textbox.
4. Click OK. A new entry will now appear in the evidence record’s Chain of Custody section, detailing, among other things, when and why the change was made.
5. If you want to print the Chain of Custody grid, click the Print hyperlink.
Note: The Chain of Custody is not included in the Investigation Report. Therefore, this printing option is only available via the Evidence/Property sub-tab.