Note an Action Request for an Activity
1. Select the Requests tab.
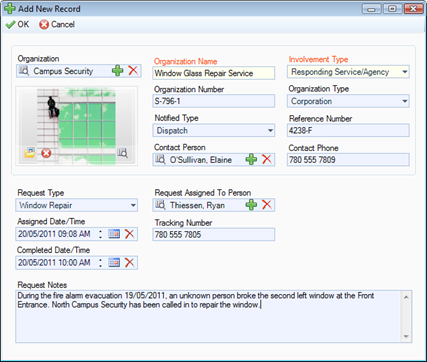
2. Select Add New. A pop-up window will open.
3. Select the requested organization’s record from the Organization pick list. If the corresponding Organization record does not already exist, use the Quick Add function to create one.
4. The Organization Name field will now automatically populate with the linked organization’s name. Depending on the data available, some additional fields may also populate with information drawn from the linked Organization record.
5. To add the organization’s logo to the record, click the Add icon  in the image box.
6. Locate the image file in the browser window and click Open.
7. Specify the type of services offered by the requested organization selecting a description from the Involvement Type lookup list.
8. If applicable, input the organization’s file, ID, or other tracking number in the Organization Number field.
9. Select the applicable Organization Type from the lookup list.
10. Specify the mode by which the action has been requested in the Notified Type lookup list (e.g., via Perspective DispatchLog, Investigator, or Control Center).
11. Note the organization’s associated Reference Number.
12. Select the name of the requested organization’s primary contact from the Contact Person pick list. If a Person record does not already exist for the individual, use the Quick Add function to create one.
13. Enter the contact person’s phone number under Contact Phone.
14. Choose the appropriate description for the requested action (e.g., Maintenance, Escort, Window Repair) from the Request Type lookup list.
15. Select the record of the person who has been administered the request from the Request Assigned To Person pick list. If a Person record does not already exist for the individual, use the Quick Add function to create one.
16. Enter the date and time the request was made in the Assigned Date/Time field.
17. When the action is complete, input the Completed Date/Time.
18. If there is a tracking or other ID number assigned to the action request, enter it in the Tracking Number field.
19. Enter any additional Request Notes.
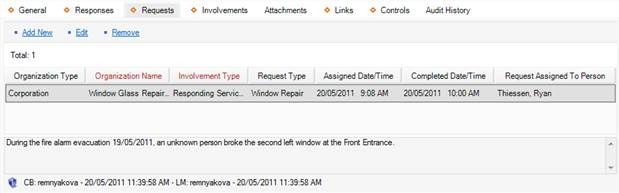
20. Click OK. The new action request entity will be saved as an entry in the Organization Responses grid.