Assign an Investigator to an Incident’s Investigation
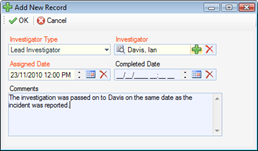
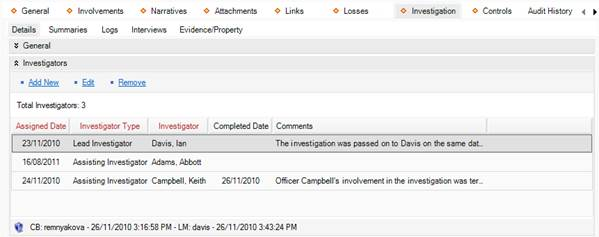
1. In the Investigators section, click Add New. A pop-up window will open.
2. Specify the applicable role of the investigator in the Investigator Type field (e.g., Lead Investigator, Assisting Investigator, Forensic Specialist).
3. Select the record of the investigator from the Investigator pick list.
4. In the Assigned Date field, enter the date and time the person was assigned to the investigation team.
5. If the investigator is removed from the investigation team at some point, you may enter the applicable date and time in the Completed Date field.
6. Enter any relevant notes in the Comments box.
7. Click OK.
8. Add as many investigators to the Investigators list as necessary.
9. Click Save. An Auto Notification pop-up window will appear.
· To send an email notification of the assigned investigation to the investigator, ensure the appropriate checkbox is selected and click Send. Notifications are automatically sent in HTML. Deselecting the Send Formatted box, prior to clicking Send, will format the notification details in plain text rather than the default HTML table.
· If the investigator does not have a primary email address entered in the system, an error message appearing beside the investigator’s name will indicate that an email cannot be sent. In this case, click Close to exit the window.